Chickpea Bread
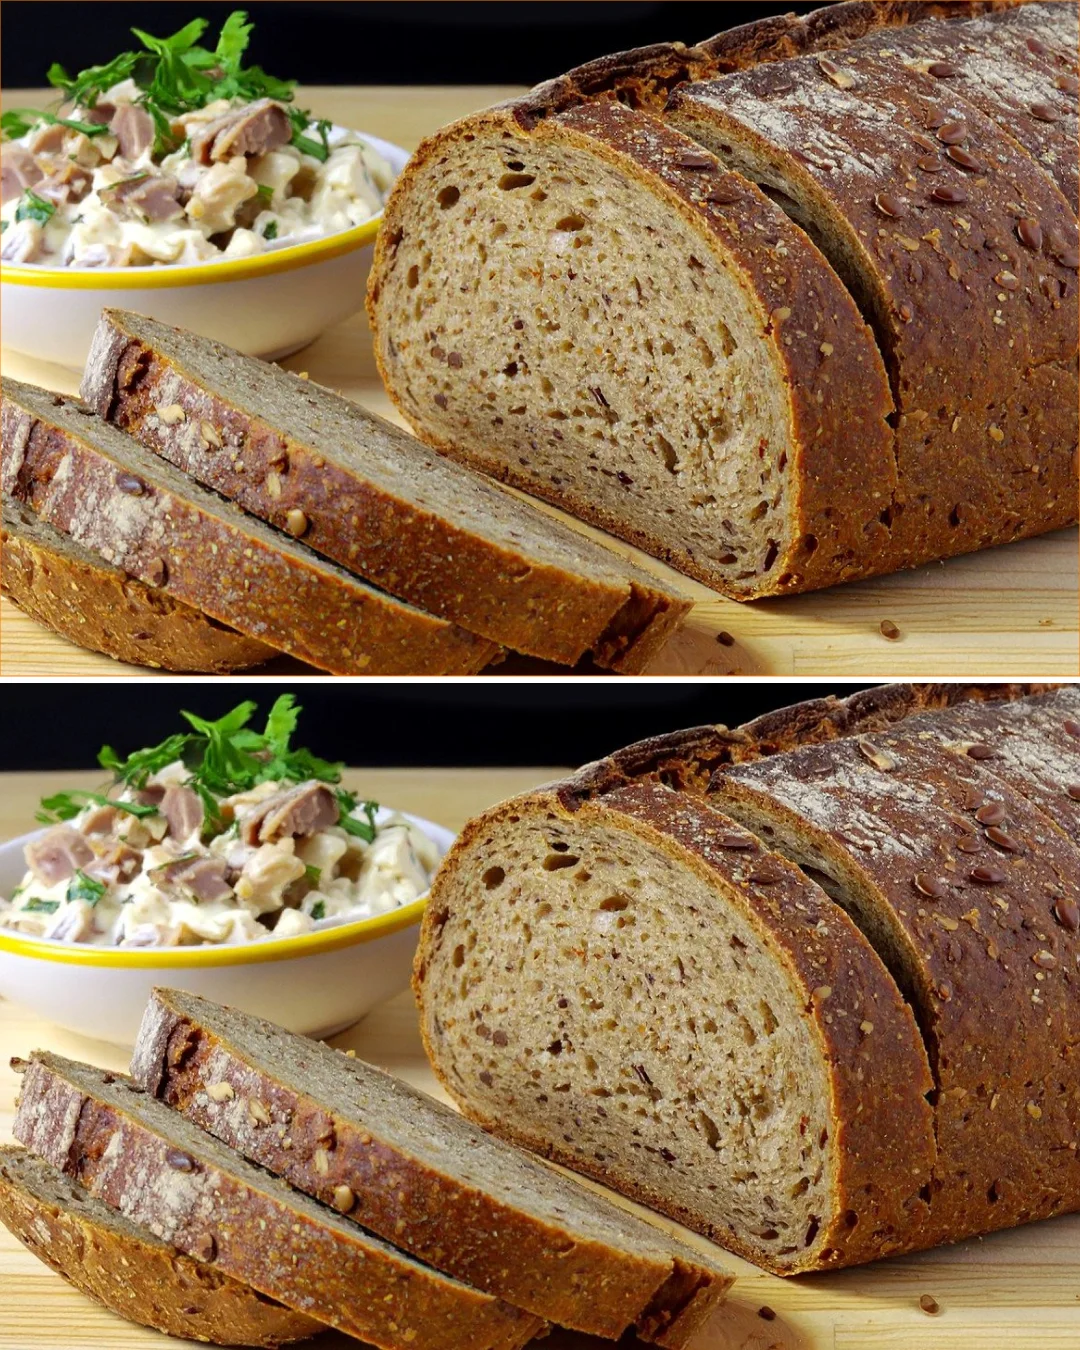
This chickpea bread has become one of those recipes people keep coming back to because it’s simple, naturally gluten-free, and surprisingly satisfying for something made from pantry staples. It’s the kind of loaf that fits right into the current trend for higher-protein, flourless baking, especially for anyone looking for a more filling bread alternative without yeast or long proofing times.
What I like most is how the texture changes once the chickpeas, flaxseed, and psyllium work together. On my first test, the batter looked almost too thick, but after baking and cooling, it sliced much more cleanly than I expected. A short rest after baking made a noticeable difference, and that’s one of those small details that really improves the final result. If you enjoy hearty, rustic breads with a slightly savory flavor, this one is worth making.
Why You’ll Love This Recipe
- Naturally gluten-free and made without wheat flour
- Uses simple pantry ingredients you may already have
- Feels hearty and filling, not light or airy like standard sandwich bread
- Works well for breakfast, snack time, or a savory side
- No yeast required, so it’s much quicker than traditional bread
- The flaxseed and psyllium help create a sliceable, sturdy texture that held up well in testing
Ingredients
- 7 ounces (200 g) dried chickpeas, soaked
- 3/4 cup plus 1 tablespoon (180 ml) water
- 3 tablespoons (25 g) ground flaxseed, plus a little extra for topping if desired
- 1/2 to 3/4 teaspoon salt
- 1/3 cup plus 1 tablespoon (40 g) psyllium husk powder
- 1 1/4 teaspoons baking powder
- 3/4 teaspoon baking soda
- 1 1/2 tablespoons (22 ml) vinegar or fresh lemon/lime juice
Ingredient Notes
The dried chickpeas need a long soak so they blend and bake properly. I tested this with a shorter soak once, and the loaf was noticeably heavier.
Ground flaxseed helps bind the bread and adds a mild nutty flavor. Use ground, not whole, flaxseed so it can actually do its job in the dough.
Psyllium husk powder is what gives this bread structure. It thickens quickly, so once everything is mixed, don’t let the dough sit too long before shaping.
The vinegar or citrus juice reacts with the baking soda and gives the loaf a little lift. Lemon juice works especially well if you want a brighter flavor.
Kitchen Tools Needed
- Mixing bowl
- Measuring cups and spoons
- Fine mesh strainer
- Baking sheet or small loaf pan
- Parchment paper
- Spoon or spatula
- Wire rack
- Oven
Step-by-Step Instructions
-
Soak the chickpeas
Place the dried chickpeas in a large bowl and cover them with plenty of water. Let them soak for at least 6 hours, or overnight if you can. They should look plumper and slightly softer after soaking. -
Drain and rinse
Drain the chickpeas well and rinse them under cool water. Shake off as much excess water as possible so the dough does not become too wet. -
Preheat the oven
Heat your oven to 355°F (180°C). Line a baking sheet with parchment paper, or lightly grease a small loaf pan if you want a more uniform shape. -
Mix the dough
In a large bowl, combine the soaked chickpeas, 3/4 cup plus 1 tablespoon (180 ml) water, ground flaxseed, salt, psyllium husk powder, baking powder, baking soda, and vinegar or lemon/lime juice. Stir until everything is evenly mixed. The dough will be thick and sticky, more like a heavy paste than a standard bread dough. -
Rest briefly
Let the mixture sit for about 3 to 5 minutes. This helps the psyllium absorb moisture and firms the dough slightly. On testing, this short rest made shaping much easier. -
Shape the loaf
With damp hands, shape the dough into a compact loaf or oval on the prepared baking sheet. If you like, sprinkle a little extra flaxseed over the top for texture. Keep the shape fairly tight so it bakes evenly. -
Bake
Bake for 50 to 60 minutes, until the loaf is firm, browned on top, and sounds a little hollow when tapped. If it starts to brown too quickly, loosely cover it with foil during the last 10 to 15 minutes. -
Cool completely
Remove the bread from the oven and transfer it to a wire rack. Let it cool fully before slicing. This step matters more than it seems; slicing too early can make the center seem gummy. -
Serve
Slice and enjoy plain, or top with about 1 tablespoon of cream cheese, yogurt, or sour cream if you want a creamy contrast.
Pro Tips
- Don’t skip the soak. Chickpeas that are only lightly softened will leave the bread dense and grainy.
- Shape the loaf with damp hands. The dough is sticky, and moisture keeps it from sticking to your palms.
- Let it cool before cutting. This bread firms up as it cools, and the texture improves a lot.
- Use parchment paper for the easiest cleanup and to prevent sticking.
- If your dough feels extremely stiff, add just a tablespoon or two of water, but only if needed. I found the original ratio works well once the psyllium hydrates.
- A small loaf shape bakes more evenly than a very wide one.
Common Mistakes to Avoid
- Using dry chickpeas straight from the bag without soaking first
- Slicing too soon while the center is still setting
- Adding too much extra water and ending up with a dense, gummy loaf
- Forgetting to shape the dough tightly, which can make the loaf spread
- First attempt mistake: I tried baking it in a thicker mound at first, and the center took much longer to set than expected
Variations
- Herb version: Add dried rosemary, thyme, or oregano for a more savory loaf
- Seeded version: Sprinkle sesame seeds, sunflower seeds, or extra flaxseed over the top before baking
- Onion flavor: Mix in a little onion powder or finely minced sautéed onion for extra depth
- Citrus version: Use lemon juice instead of vinegar for a slightly fresher flavor
Serving Suggestions
This chickpea bread works well warm or at room temperature. Serve it with cream cheese, yogurt, sour cream, hummus, avocado, or a simple tomato topping. It also makes a solid side for soups and stews because it holds together better than many gluten-free breads.
Storage Instructions
Store cooled bread in an airtight container in the refrigerator for up to 4 days. For longer storage, slice it first and freeze the slices with parchment between them for up to 2 months.
Reheating Tips
Reheat slices in a toaster oven, skillet, or regular toaster until warmed through. If reheating a whole loaf, warm it in a 300°F (150°C) oven for about 10 to 12 minutes.
Nutrition Estimate
Per serving, based on 8 servings:
- Calories: 165
- Protein: 8 g
- Carbs: 24 g
- Fat: 4 g
Recipe Summary Card
- Prep Time: 10 minutes, plus 6 hours soaking
- Cook Time: 50 to 60 minutes
- Total Time: about 7 hours
- Servings: 8
- Cuisine: Modern gluten-free
- Course: Bread, snack, side
- Calories: 165 per serving
Frequently Asked Questions
Can I use canned chickpeas instead of dried?
I wouldn’t recommend it for this recipe. The texture is built around soaked dried chickpeas, and canned chickpeas are too soft and wet for the same result.
Why is my chickpea bread gummy in the middle?
That usually means it needed more baking time or it was sliced too early. Cooling fully is important for the final texture.
Can I make this without psyllium husk powder?
Psyllium is the main structure builder here, so leaving it out will change the bread a lot. The loaf will likely fall apart more easily.
Does this taste like chickpeas?
Slightly, yes, but in a mild, earthy way. The flaxseed, salt, and optional topping help round out the flavor.
Can I bake it in a loaf pan?
Yes, a small loaf pan works well and can give you neater slices. Just keep an eye on the center so it bakes through evenly.
Conclusion
This chickpea bread is a practical, nourishing recipe that delivers more than you might expect from such a short ingredient list. It’s hearty, easy to customize, and best of all, it actually works in a real kitchen without complicated steps.
Tested Note
I tested this twice, and the loaf improved noticeably when I let it cool completely before slicing. The texture was also better the next day, which makes it a good make-ahead option.